


Creating a New Shift
Shifts are the building blocks of your security schedule. Each shift defines when, where, and who should be on duty.
Accessing Scheduling
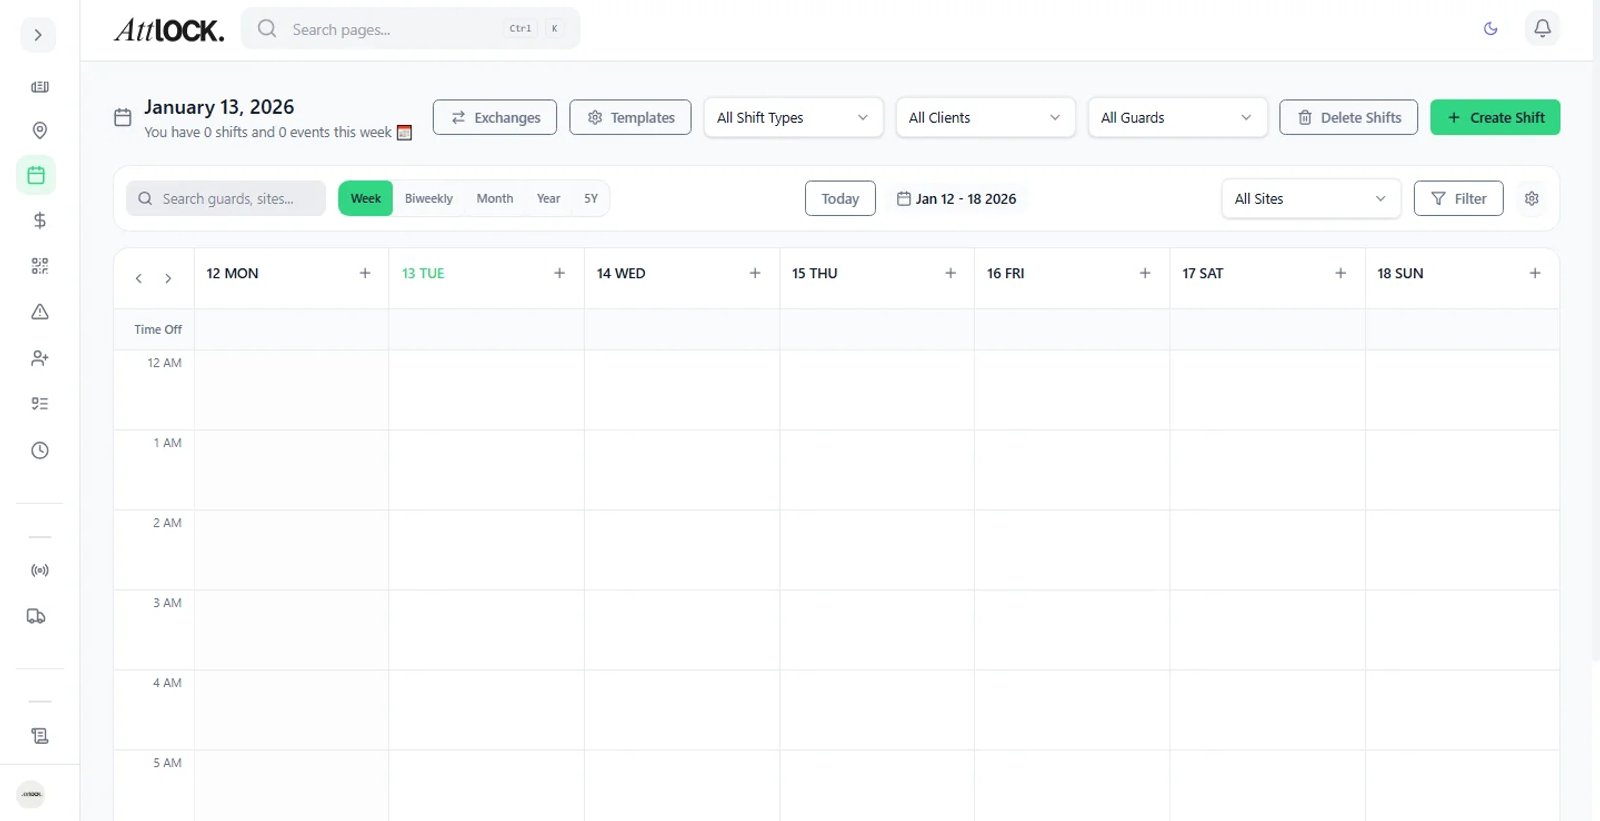
- Navigate to Operations > Scheduling in the sidebar (shortcut: `G` then `C`).
- You will see the schedule calendar view.
Creating a Single Shift
- Click the Create Shift button, or click directly on a date/time slot in the calendar.
- Fill in the shift details:
Basic Details
- Shift Name — A descriptive label (e.g., "Day Shift", "Night Patrol", "Lobby Coverage").
- Site — Select the site this shift is for.
- Date — The date of the shift.
- Start Time — When the shift begins.
- End Time — When the shift ends.
- Break Duration — Scheduled break time within the shift (e.g., 30 min, 1 hour).
Assignment
- Assign Guard — Select a specific guard, or leave unassigned for an open shift.
- Required Guards — If the shift needs multiple guards, set the count.
- Skills Required — Optionally require specific certifications or skills.
Shift Settings
- Shift Type — Regular, Overtime, On-Call, Training.
- Pay Rate — Override the default pay rate if needed.
- Notes — Instructions or context for the assigned guard.
- Click Create Shift.
Creating Recurring Shifts
For regular schedules that repeat:
- When creating a shift, enable the Recurring toggle.
- Configure the recurrence pattern:
- Daily — Every day or every N days.
- Weekly — Select specific days of the week (e.g., Mon-Fri).
- Bi-weekly — Every two weeks.
- Monthly — Specific day of the month.
- Set the End Date or choose No End Date for indefinite recurrence.
- Click Create — all recurring instances are generated.
Tip: Use Shift Templates for commonly repeated patterns. This saves time and ensures consistency.
Bulk Shift Creation
For creating many shifts at once:
- Go to Operations > Shifts.
- Click Bulk Create.
- Options:
- From Template — Apply a shift template to a date range.
- CSV Import — Upload a spreadsheet of shifts.
- Copy Week — Duplicate an entire week's schedule to another date range.
Using CSV Import
- Download the CSV template.
- Fill in one row per shift: date, starttime, endtime, site, guardemail, shifttype.
- Upload the file.
- Review the preview for errors.
- Click Import Shifts.
Using Shift Templates
Templates save shift patterns for reuse:
- Go to Operations > Scheduling > Templates.
- Click Create Template.
- Define the pattern:
- Template name.
- Days of the week.
- Start/end times for each day.
- Site assignment.
- Break schedules.
- Save the template.
To apply a template:
- Go to the scheduling calendar.
- Click Apply Template.
- Select the template and date range.
- Assign guards or leave as open shifts.
- Click Apply.
Assigning Guards to Shifts
Manual Assignment
- Click on an unassigned shift in the calendar.
- Click Assign Guard.
- Select a guard from the dropdown. The list shows:
- Guard name and role.
- Availability status (available, on leave, already scheduled).
- Qualification match (if skills are required).
- Click Assign.
Auto-Assignment
Atlock can suggest guard assignments based on:
- Availability and existing schedule.
- Site assignment and proximity.
- Skill/certification requirements.
- Overtime limits.
- Fairness (even distribution of shifts).
Publishing the Schedule
Shifts are in Draft status until published:
- After creating and assigning shifts, click Publish Schedule.
- Select the date range to publish.
- Choose notification options:
- Notify All — Send push notifications to all assigned guards.
- Notify New Only — Only notify guards with new or changed shifts.
- Silent — Publish without notifications.
- Click Publish.
Once published:
- Guards can see their shifts in the mobile app.
- Clock-in/out is enabled for published shifts.
Editing and Cancelling Shifts
Editing a Shift
- Click on the shift in the calendar.
- Click Edit.
- Modify any details.
- Click Save — if the shift is already published, the guard will be notified of changes.
Cancelling a Shift
- Click on the shift.
- Click Cancel Shift.
- Provide a reason (optional).
- Confirm — the guard will be notified.
Warning: Cancelling a shift within 24 hours may have pay implications depending on your company policy.
Viewing the Schedule
Calendar View
The main view shows shifts as colored blocks:
- Blue — Assigned and published.
- Orange — Unassigned / open shift.
- Green — Currently active (guard clocked in).
- Gray — Draft (not yet published).
- Red — Cancelled.
List View
Switch to list view for a table format showing all shifts with sortable columns.
Filter Options
- By Site — Show shifts for a specific site.
- By Guard — Show one guard's schedule.
- By Status — Published, Draft, Cancelled.
- By Date Range — Custom date range.
Tips & Best Practices
- Plan two weeks ahead — Give guards sufficient notice of their schedules.
- Use templates for repeating patterns to save time.
- Leave buffer between shifts — Avoid scheduling back-to-back shifts (minimum 8 hours between shifts is recommended).
- Publish promptly — Guards rely on published schedules for planning their personal time.
- Track overtime — Monitor the Analytics dashboard for guards approaching overtime thresholds.
Troubleshooting
Guard can't see their shift
- Verify the shift is Published (not still in Draft).
- Check that the guard is assigned to the shift.
- Ask the guard to refresh their mobile app.
Scheduling conflicts
- Atlock warns you when creating overlapping shifts for the same guard.
- Review the conflict dialog and choose to override or reassign.
Can't create shifts
- You need the `shifts.create` permission.
- Verify your role in Access Control.
Related Articles
- Using Shift Templates
- Managing Shift Swaps and Exchanges
- Using Coverage Forecasting
- Setting Up Auto-Approval Rules